
Edit: When I first wrote this article, it was necessary to manually implement the Facebook tracking pixels. However, since then, Shopify has made the process really simple!
You can simply take your Facebook pixel ID, and paste it into the Shopify Admin.
The section you’re looking for is currently located at Sales Channels > Online Store > Preferences. Scroll down to this section and paste your pixel ID in:

Shopify’s article has more information on the process, and how their implementation works!
Old Article:
Implementing Facebook’s new tracking pixel on your Shopify store is relatively straightforward, like anything, once you know how.
At a high level, it works in two parts. You have a piece of code that goes on all pages, and then you have additional code, added below it, that will capture and pass information to the tracking pixel.
The extra information could be things like telling Facebook the customer has landed on the order confirmation page, or they landed on the cart page – and you could then pass Facebook the products that are in the cart at the moment.
Below we’re going to cover how to add the new Facebook pixel to your store, and get it tracking your sales.
If you’d like to track add to cart actions also, then after following this, take a look at my article on the subject.
First load up Power Editor, then go to Tools > Pixels:
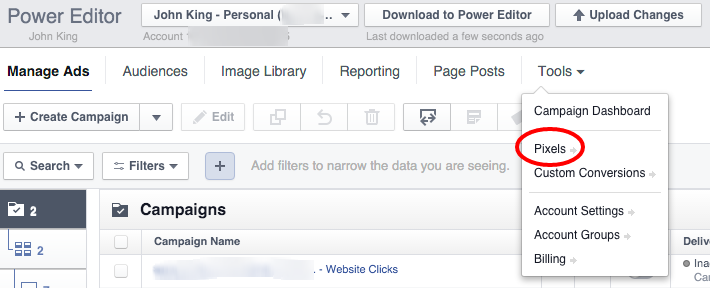
If you haven’t visited this page before, you may get a nice splash screen introducing you to the “new” pixel.
Now you’ll want to go to Actions > View Pixel Code:
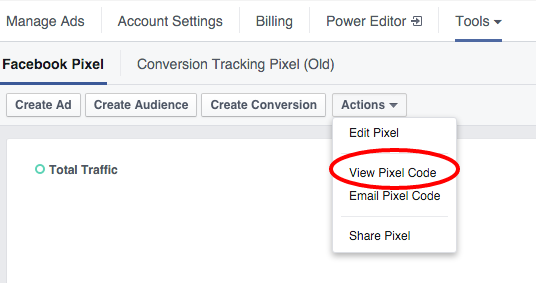
The code comes in two parts. The first is a snippet that you’ll want to use on all pages:
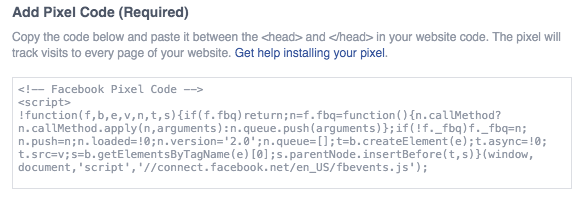
As Facebook suggests, this needs to go in between <head> tags. Which can be found in your theme’s theme.liquid file.
If you want a specific location, I’d suggest adding the code just before the closing </head> tag.
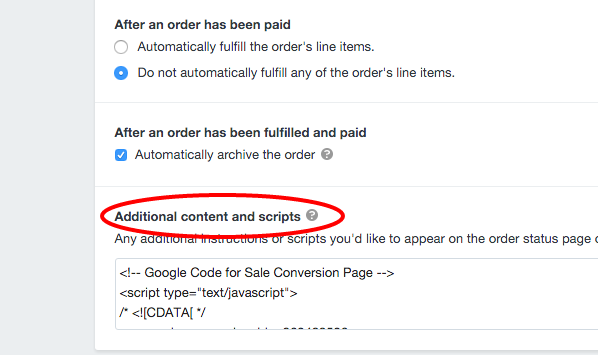
Next we need to add a modified version of this code to your checkout page.
You can access your Shopify’s checkout code by going to Settings > Checkout. Then scroll down to Additional content and scripts:
Here we want to take the standard code, which looks something like:

Then add a small script to the bottom:
<script>

fbq('track', 'Purchase', {

value: '{{ subtotal_price | money_without_currency }}',

currency: '{{ shop.currency }}'

});

</script>
Making the full script you’re adding to look something like this:
{% if first_time_accessed %}
<script>
!function(f,b,e,v,n,t,s){if(f.fbq)return;n=f.fbq=function(){n.callMethod?
n.callMethod.apply(n,arguments):n.queue.push(arguments)};if(!f._fbq)f._fbq=n;
n.push=n;n.loaded=!0;n.version='2.0';n.queue=[];t=b.createElement(e);t.async=!0;
t.src=v;s=b.getElementsByTagName(e)[0];s.parentNode.insertBefore(t,s)}(window,
document,'script','//connect.facebook.net/en_US/fbevents.js');
fbq('init', '52426583439xx89');
fbq('track', 'Purchase', {
value: '{{ subtotal_price | money_without_currency }}',
currency: '{{ shop.currency }}'
});
</script>
<noscript><img height="1" width="1" style="display:none"
src="https://www.facebook.com/tr?id=52426583439xx89&ev=PageView&noscript=1"
/></noscript>
{% endif %}
You can’t use all that code exactly, because you’d need to replace where it reads FB_PIXEL_ID with your actual Facebook pixel ID. But at least you get an idea of what you’re aiming for.
The {% if first_time_accessed %} tag is useful now that the order confirmation page doubles as a page for customers to track order status. It reduces the number of falsely tracked sales. Check out Shopify’s site for more info on the first time accessed tag.
The additional script uses Shopify’s liquid tags to pull in the total value of the conversion (excluding tax and shipping) + the stores currency, and passes that to Facebook.
That’s it!
To test this is all now working, there are two things you can do.
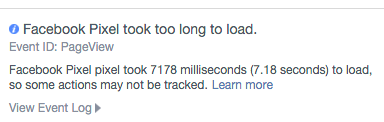
The first is to install the Facebook Pixel Helper, a Chrome extension, that you can run on your site, and it will report back if the pixel is running.
Don’t panic if it reports back saying the pixel took too long to load. Its not ideal, but from experience the pixel does still work despite this message.
Next we’ll want to check if the pixel is tracking conversions.
If you’ve got a relatively busy store, the easiest way to do this is to wait for someone to make a purchase, then go back to the Pixel page in PowerEditor – and look under Events to see if someone made a purchase.
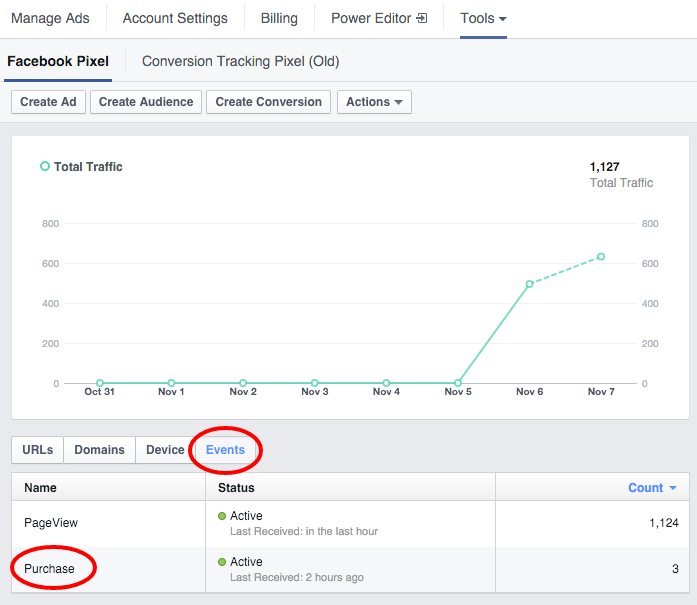
If sales aren’t showing up here, then there’s a good chance there’s something wrong with the code you’ve used.
To view the results of your campaigns you’ll want to select these two columns in Ads Manager:
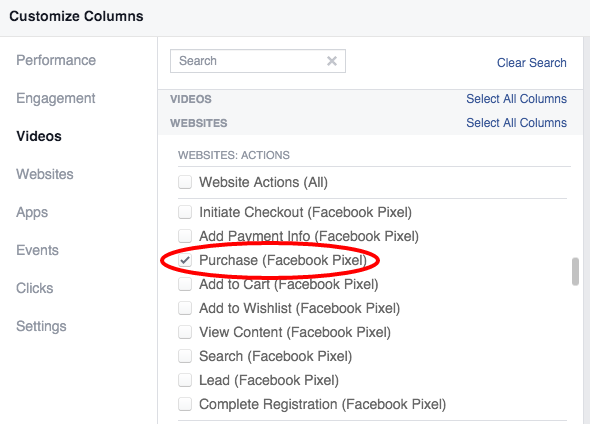
and:

Adding those two columns will give you the number of sales + the sales value.
So thats pretty much it.
Something that confused me initially, that might be worth pointing out, is the inter-relationship between Facebook’s pre-determined conversion types and then a feature they call Custom Conversions. The new pixel provides 9 types of conversions (see table below). Each is implemented using the new pixel, and then just customising a small bit of extra code:
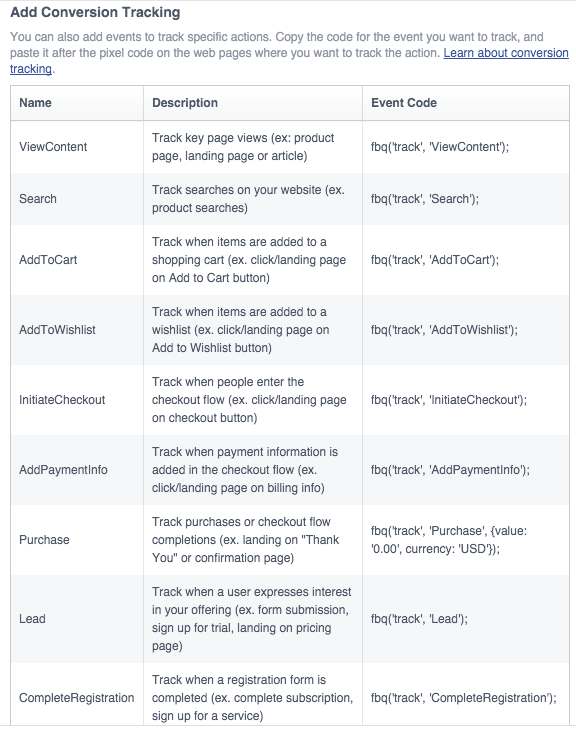
However, if you want to track something outside of that scope, you can setup a custom conversion.
They work by targeting text strings in the URL:
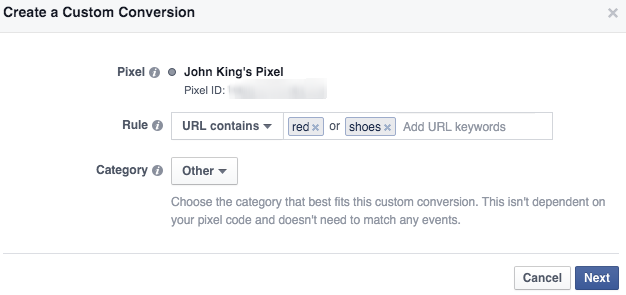
The main thing to know is that they’re optional, and in most cases probably not needed.
If you want to setup any of the other types of conversion tracking in the table above, you’ll need a bit more information. I’ve written about tracking things like add to cart here.
There’s also the developer docs which are useful for reference.
If you’d like help getting this setup, see my work with me page.
Leave a Reply